How to Get AI Coding Agents to Follow Your Design System
AI coding agents ignore your design system and write hardcoded colors and random spacing. Here is how to give them the context and the checks to stay on it.

AI has made it ridiculously easy to build interfaces. All you need to do is describe a page, and an agent can have something working in a few minutes.
However, getting it to fit your existing design system is the hard part. You end up with buttons that look slightly different, spacing that feels off, and hardcoded colors that were never part of your design system. The more pages you generate, the messier it gets.
So how do you get AI to stop guessing and follow the same design rules as the rest of your app?
I tried this with Ledger, a small billing app. We'll use its invoice status badge to walk through the Panda CSS setup, then ask an agent to build a full billing settings page and see what it does.
Why AI agents ignore your design system
Here's the kind of badge an agent writes when it can't see your design system:
<span className={css({ bg: '#fee2e2', color: '#b91c1c', px: '8px', py: '2px', rounded: '9999px', fontSize: '12px' })}>
  Failed
</span>
From the code above, nothing is obviously broken. The badge renders, and the colors might even look right. However, the values are hardcoded directly into the component. If you decide to change the app's color palette, this badge won't automatically update to that color.
An agent can only work with the context it has. If the existing components use hardcoded values, those become examples it'll copy. If your design decisions are hidden in Figma, or scattered across files the agent hasn't read, it has to guess.
We need to make the intended styling choices easy to discover, easy to reuse, and harder to bypass.
Step 1: Give the agent a system to copy
First, let's give the agent something better than raw color values to work with.
For an invoice status, status.failed.bg tells you what the color is for. red.100 only tells you what it looks like.
Panda CSS supports this distinction through semantic tokens.
panda.config.ts
import { defineConfig } from '@pandacss/dev'

export default defineConfig({
  // ...
  theme: {
    extend: {
      semanticTokens: {
        colors: {
          status: {
            failed: {
              bg: { value: '{colors.red.100}', description: 'Failed payment badge background' },
              fg: { value: '{colors.red.700}', description: 'Failed payment badge text' }
            }
            // paid, overdue, and draft follow the same shape
          }
        }
      }
    }
  }
})
The
descriptionfield is optional, but it could give your agent a clue as to when to use each token.
Then turn the badge into a recipe, so the agent picks a status instead of picking colors:
theme/badge.ts
import { defineRecipe } from '@pandacss/dev'

export const badge = defineRecipe({
  className: 'badge',
  description: 'Invoice status. Pick a status, never set badge colors by hand.',
  base: { px: '2', py: '0.5', rounded: 'full', fontSize: 'xs', fontWeight: 'medium' },
  variants: {
    status: {
      paid: { bg: 'status.paid.bg', color: 'status.paid.fg' },
      overdue: { bg: 'status.overdue.bg', color: 'status.overdue.fg' },
      failed: { bg: 'status.failed.bg', color: 'status.failed.fg' },
      draft: { bg: 'status.draft.bg', color: 'status.draft.fg' }
    }
  },
  // The status comes from invoice data at runtime, so generate CSS for every status
  staticCss: [{ status: ['*'] }]
})
Register it in your config:
panda.config.ts
import { badge } from './theme/badge'

export default defineConfig({
  theme: {
    extend: {
      recipes: { badge }
      // ...
    }
  }
})
Now the badge is one line:
<span className={badge({ status: 'failed' })}>Failed</span>There's another step that's easy to overlook: update the existing UI to use the recipe too. Agents often take cues from nearby code. This means, if your app still has three different handwritten badge implementations, you've left three competing examples for it to follow.
In our test, once the pages used badge(), the agent used it too, without being told.
Step 2: Help your agent find and use your design system
Having tokens and recipes in the project doesn't mean an agent will automatically look for them. We can make that much more likely in three ways.
- Give it your project rules: Add a short styling section to
AGENTS.md(orCLAUDE.md, or whatever file your agent reads first)
AGENTS.md
## Styling

- Use the recipes in `styled-system/recipes` (`badge`, `button`, `card`, `input`). Don't style these by hand.
- Use semantic tokens like `status.failed.bg` and `fg.muted`. Never write hex colors, px values, or inline styles.
- If a token you need doesn't exist, stop and say so. Don't invent one.- Use Panda's agent skills: These teach the agent how Panda works, like where to find your token names. Install them:
npx skills add chakra-ui/pandaRead more in the Agent Skills docs.
- Install the Panda MCP server: This lets the agent look up the tokens and recipes that exist in your project right
now. Add it to
.mcp.jsonin your project root:
.mcp.json
{
  "mcpServers": {
    "panda": {
      "command": "npx",
      "args": ["-y", "@pandacss/mcp"]
    }
  }
}
Read more in the MCP Server docs.
Step 3: Catch styling mistakes before they ship
Panda's strictTokens setting tightens the accepted values for token-backed style properties. Turn on
strictTokens in your config:
panda.config.ts
export default defineConfig({
  strictTokens: true
  // ...
})
Now a hardcoded value on a property that has tokens is a TypeScript error. The original badge, with '#fee2e2' and
'8px', no longer compiles.
Then add the Panda ESLint plugin, which checks your code against your actual tokens:
eslint.config.mjs
import panda from '@pandacss/eslint-plugin'

export default [
  // ...your existing config
  await panda.configs.recommended({ configPath: './panda.config.ts' }),
  {
    rules: {
      '@pandacss/prefer-token': ['error', { categories: ['colors', 'spacing', 'radii', 'fontSizes'] }]
    }
  }
]
Run it on the original badge and the lint output might look like this:
error  Hardcoded colors value "#fee2e2". Matching tokens: red.100, status.failed.bg (themed).
error  Hardcoded spacing value "8px". Matching tokens: 2.
error  Hardcoded radii value "9999px". Matching tokens: full.
error  Hardcoded fontSizes value "12px". Matching tokens: xs.
When a hardcoded value exactly matches an existing token, the rule can suggest a replacement. For example, Ledger
defines red.100 as #fee2e2. A similar looking value that doesn't match a token won't necessarily get the same
helpful suggestion.
Run the checks automatically
Checks only help if they run. Add a line to AGENTS.md asking the agent to run them before it finishes:
AGENTS.md
- Before you say you're done, run the type check and the linter (`tsc --noEmit` and `eslint .`) and fix every error.Then run the same commands in CI, so nothing outside the system merges, whether a person or an agent wrote it. If you use Claude Code, a hook can also lint every file the agent edits and send the errors straight back to it.
Putting it to the test
So, we've set up our tokens, created reusable recipes, given the agent instructions, and added checks to catch mistakes.
But does all of this actually make a difference in the code AI generates?
To find out, we ran a small experiment using Claude Code and our Ledger app.
We gave the agent the same task three times before setting up the design system rules, and three more times afterward.
The prompt was, "Build a billing settings page that matches the rest of the app."
For each page the agent built, we counted the hardcoded hex colors in the code (values like #fecaca instead of a
token):
| Attempt | Before the setup | After the setup |
|---|---|---|
| 1 | 11 | 0 |
| 2 | 20 | 0 |
| 3 | 17 | 0 |
The AGENTS.md rule and strictTokens both rule out hex colors, so the zeros were expected. With three runs each,
treat this as a signal, not a benchmark.
After the changes, the agent used the existing recipes for every badge, button, card, and input it created.
And here's the interesting part: the pages looked almost identical.
Before: Hardcoded styles everywhere
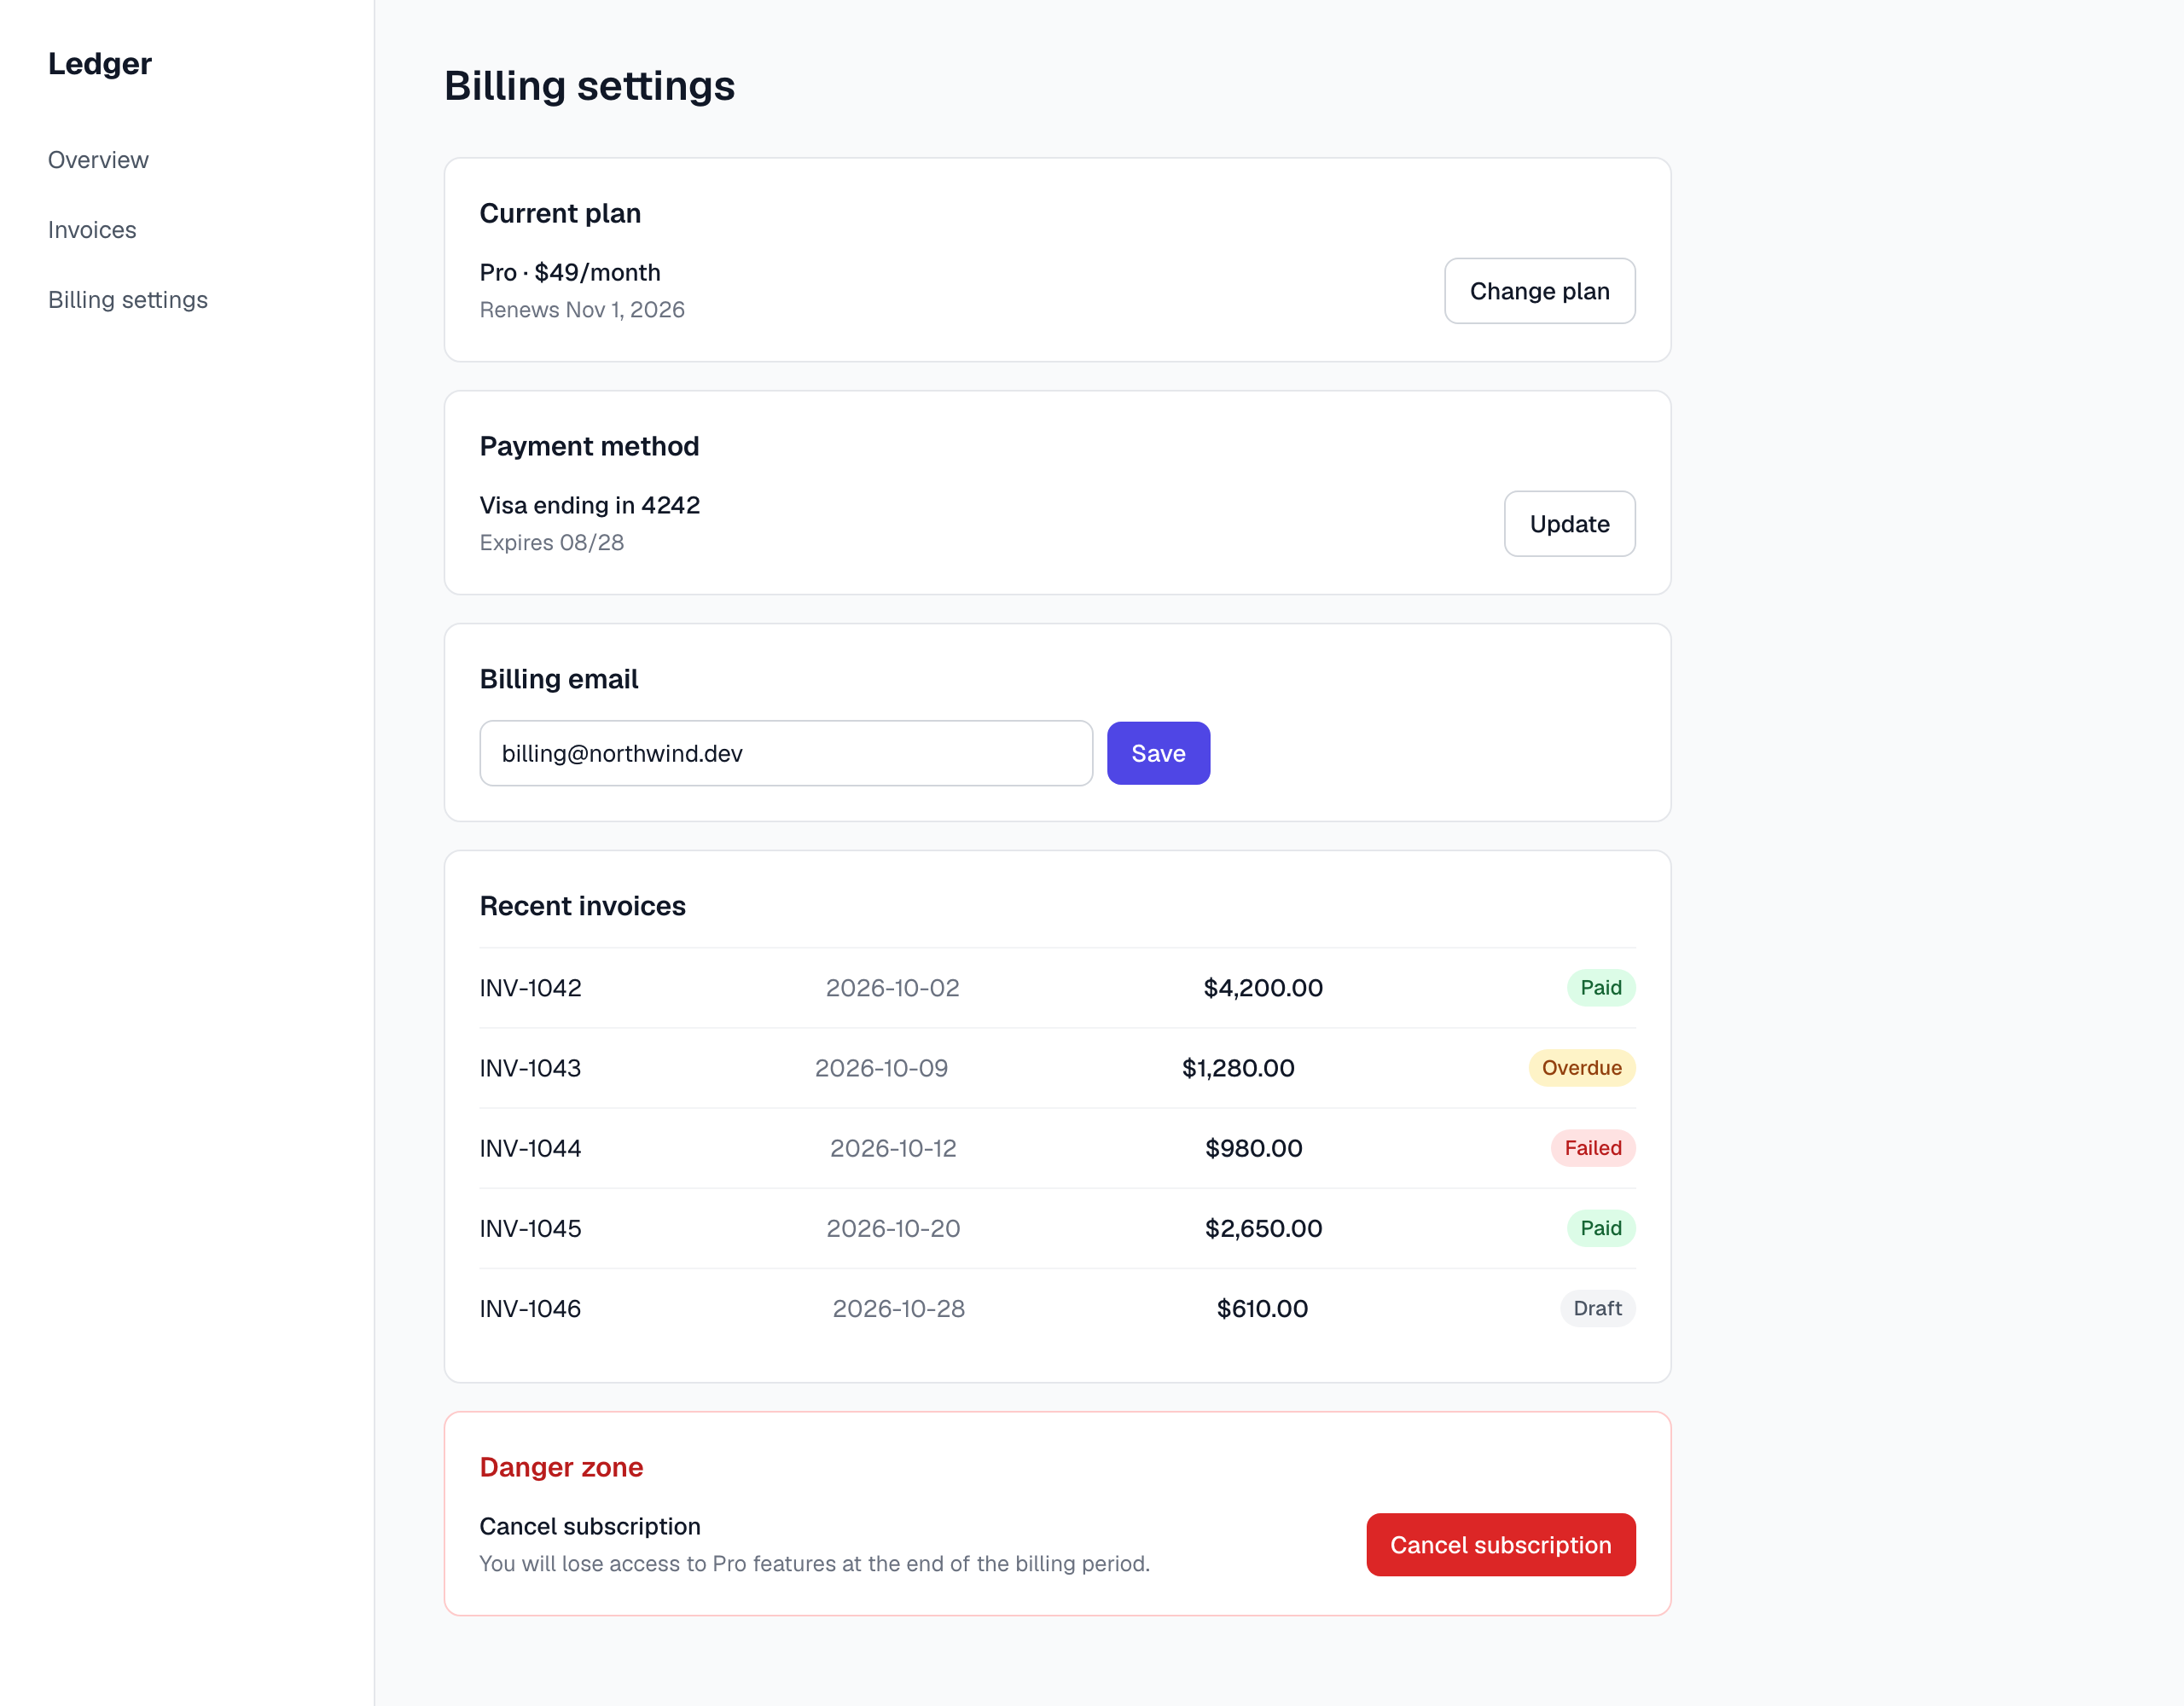
Before: the billing page the agent built with no design system to follow.
<section
  className={css({
    bg: 'white',
    border: '1px solid #fecaca',
    borderRadius: '10px',
    padding: '20px'
  })}
>
  <h2
    className={css({
      fontSize: '16px',
      fontWeight: 600,
      mb: '12px',
      color: '#b91c1c'
    })}
  >
    Danger zone
  </h2>
  {/* ... */}
  <button
    className={css({
      bg: '#dc2626',
      color: 'white',
      padding: '8px 14px',
      borderRadius: '8px',
      fontSize: '14px',
      _hover: { bg: '#b91c1c' }
    })}
  >
    Cancel subscription
  </button>
</section>
The agent made all the styling decisions itself. It chose the colors, spacing, border radius, and typography.
It even introduced a new red, #fecaca, that wasn't used anywhere else in the app.
Now compare that with what it generated after we set everything up.
After: Using existing tokens and recipes
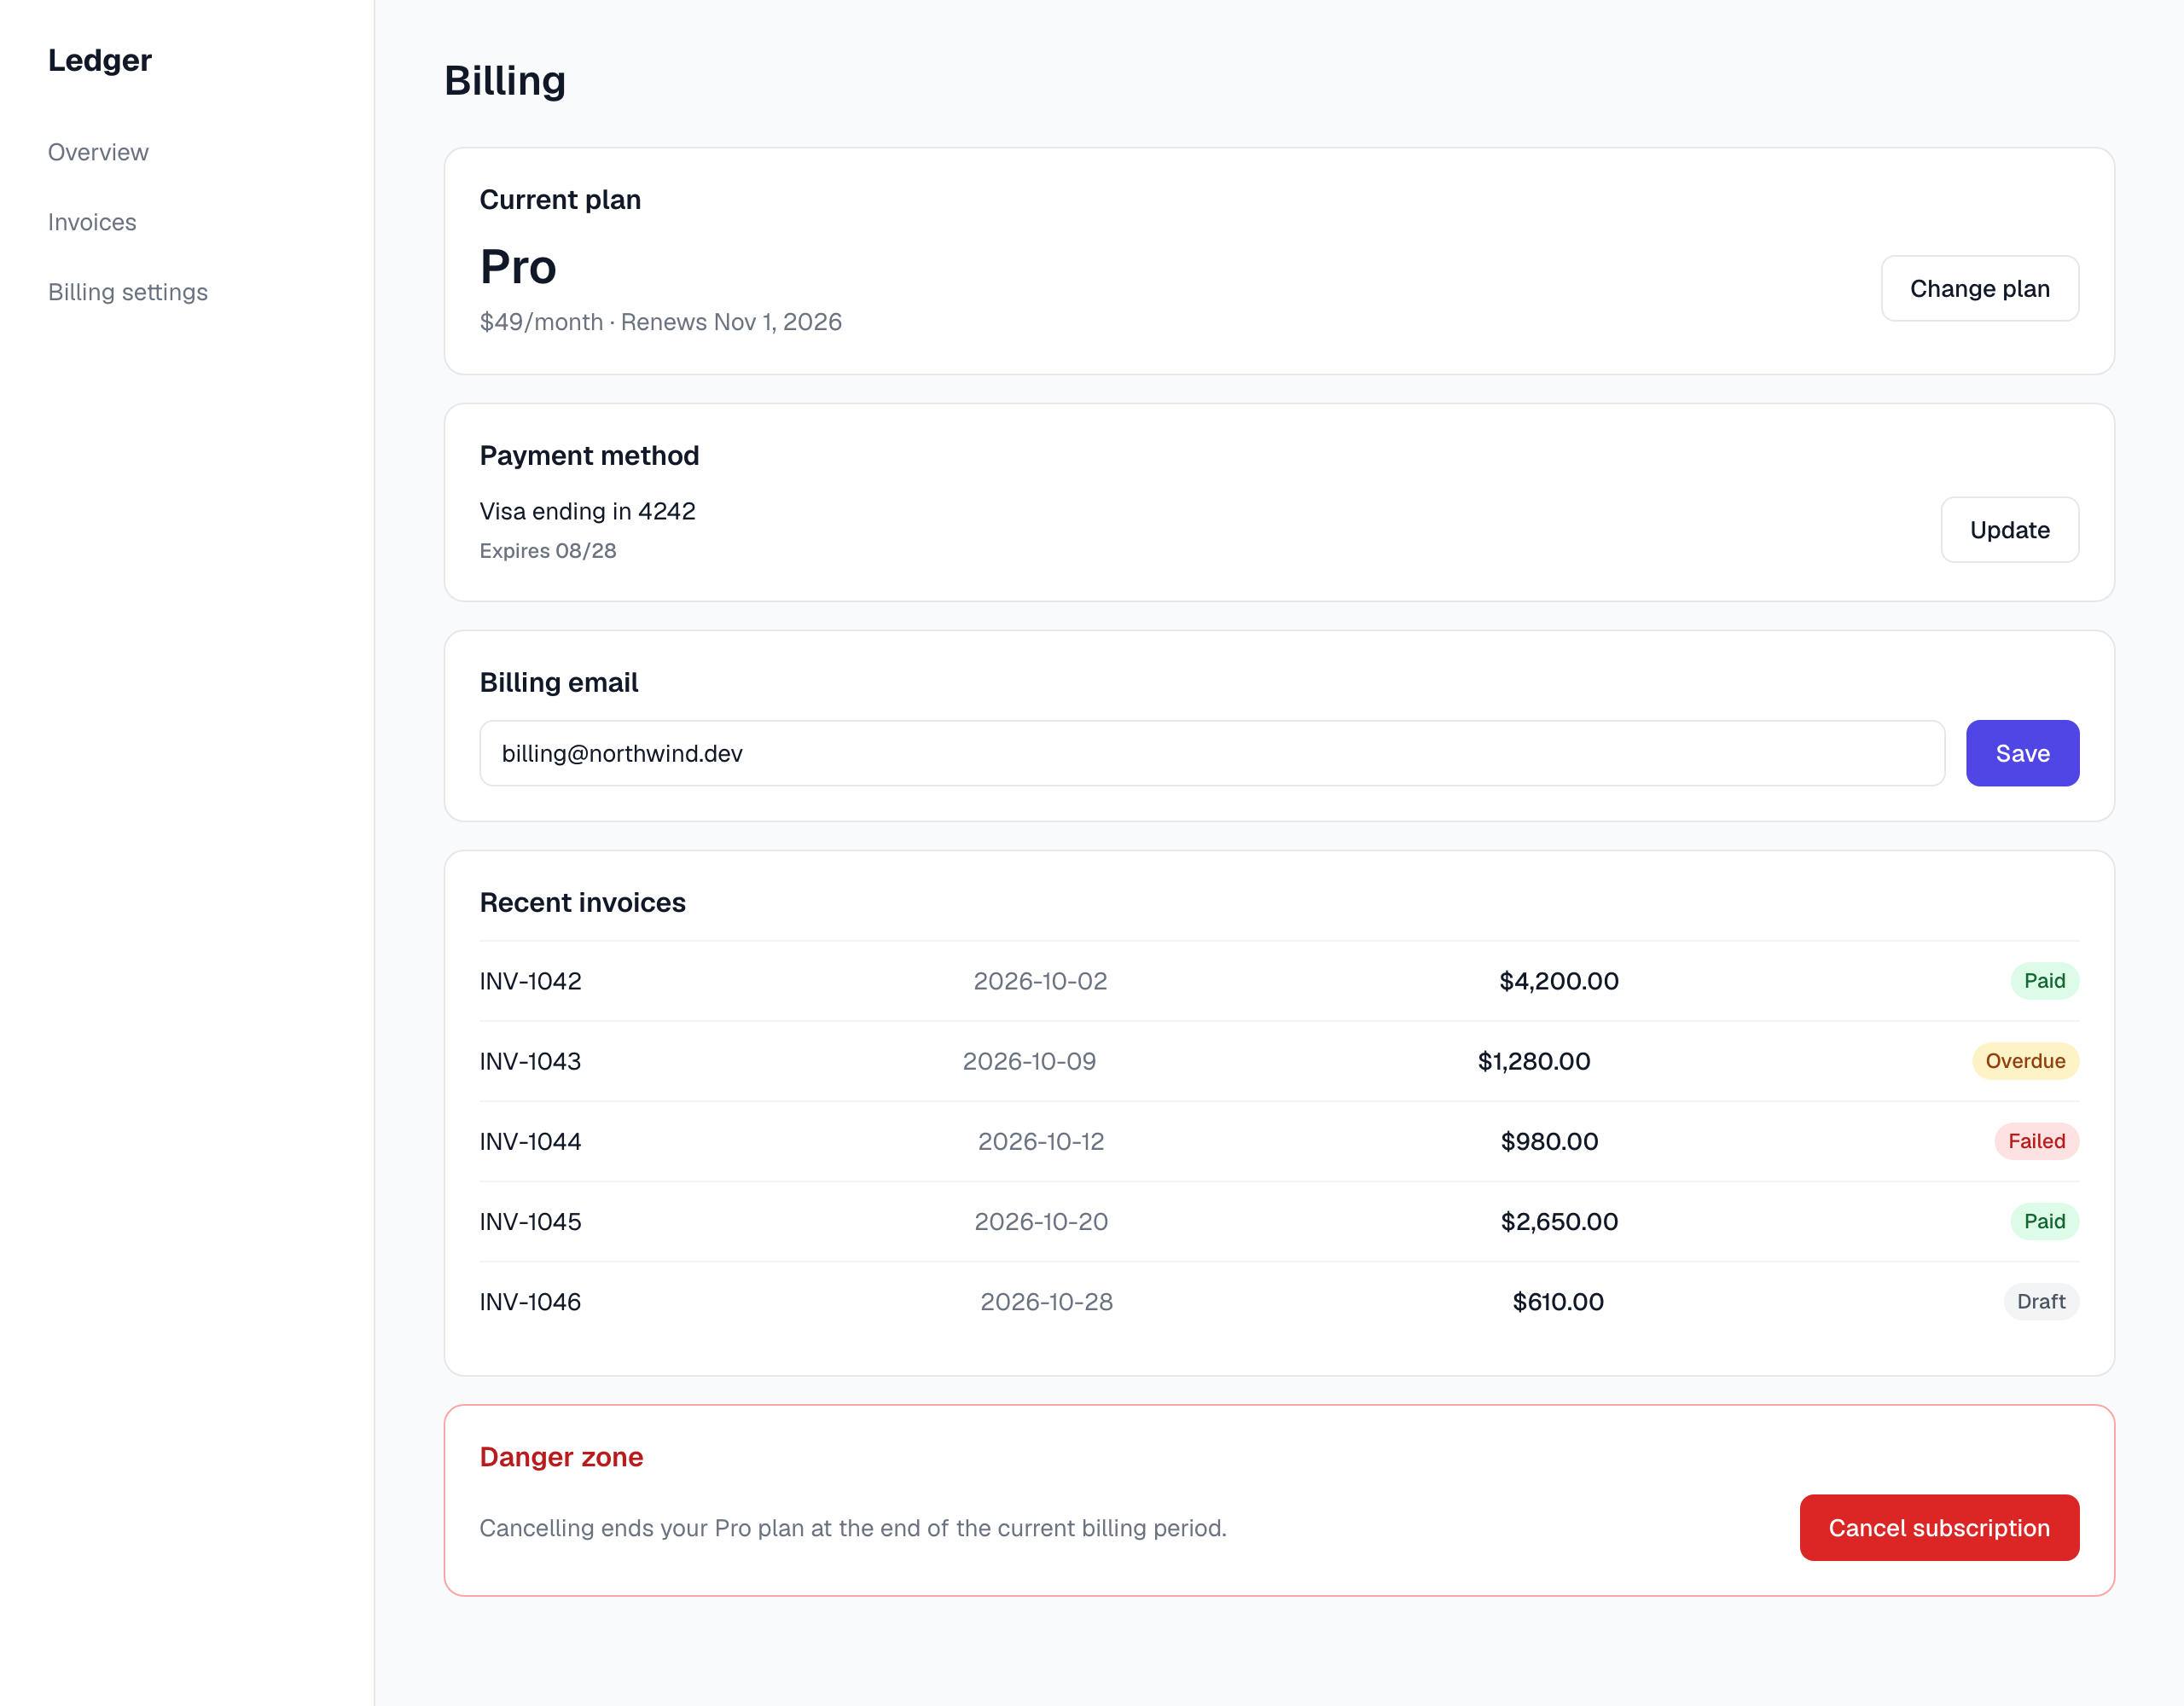
After: the billing page the agent built with tokens, recipes, rules, and checks in place.
<section className={card({ tone: 'danger' })}>
  <h2
    className={css({
      textStyle: 'sectionTitle',
      color: 'fg.danger',
      mb: '3'
    })}
  >
    Danger zone
  </h2>
  {/* ... */}
  <button className={button({ variant: 'danger' })}>Cancel subscription</button>
</section>
Instead of defining everything from scratch, the agent reused the card and button recipes we already created. It
also used our typography and color tokens.
Give it a try in your own project
You don't need to set up everything at once. You can start with the Panda agent skills:
npx skills add chakra-ui/pandaThen give your agent a task and read the code it writes. If it still invents styles you've already defined, add the project rules, the Panda MCP server, and linting.